This is a document used by Healthcare Practitioners (doctors) to enter the Signs and Symptoms, examination details of the Patient, Preliminary and Final diagnosis, Lab orders, Radiology orders, Procedures Orders, Medication Orders, Therapy Plans and other details when examining the Patient.
Patient encounter is created as a draft automatically after the Vital Signs has been submitted by a Nurse, and it is used to order the Lab tests, Radiology examinations, Procedures, Medications and Therapies (LRPMT's) which are to be done or be provided to the Patient. It is also used to view Patient History of the Patient to see the previous examination details and treatment provided to the Patient.
To access Patient Encounter, go to;
Healthcare > Patient Encounter
Prerequisites
The following is required before a Patient Encounter is created;
Entering Details in Patient Encounter
- Go to Patient Encounter List.
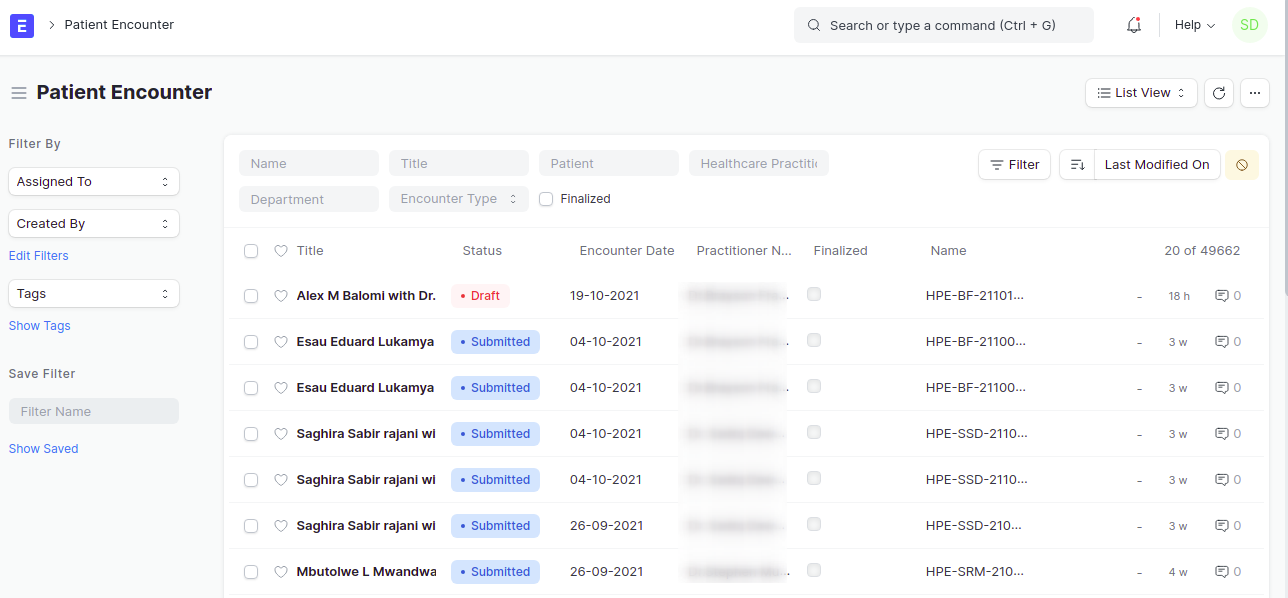
- Firstly, filter the encounters using the name of the Healthcare Practitioner in the filter of Healthcare Practitioner, you can also filter by using the department name in Department filter. This will help to see only Patients who are to be consulted by the Healthcare Practitioner.
- Click on the title of the Encounter in order to open the Patient encounter file.
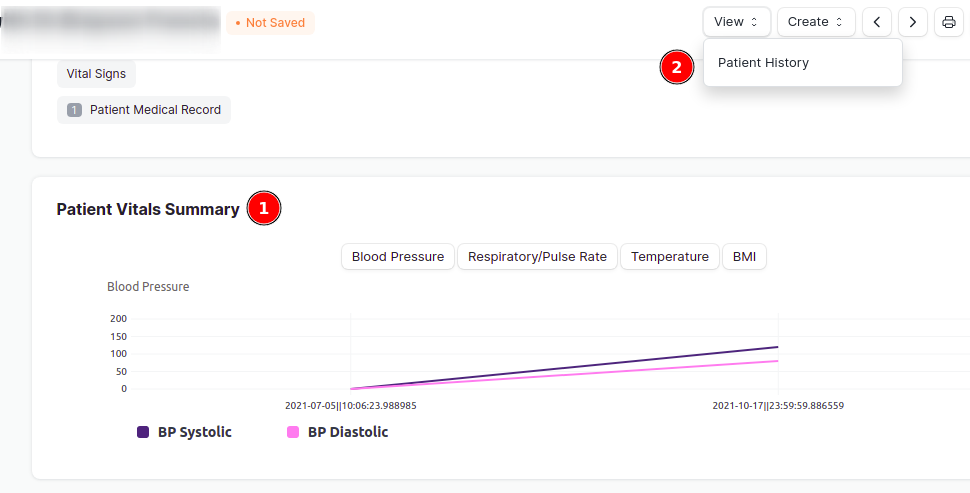
- After opening the file, a graph of Patient Vitals summary will appear on the top, which shows a summary of vital signs, or press on View > Patient History. to view the whole Patient history of the patients since their first visit at the hospital including the current vital Signs.

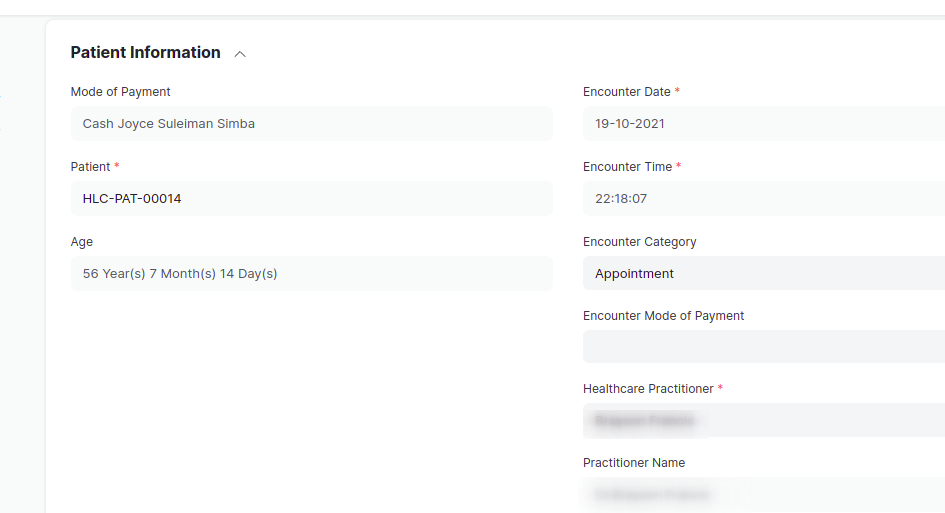
- Go back to the Patient encounter file by clicking on <- at the top left of the browser. To check the details of the patient, scroll down to Patient Information section, it will also show whether the patient is using an insurance or is a cash patient.
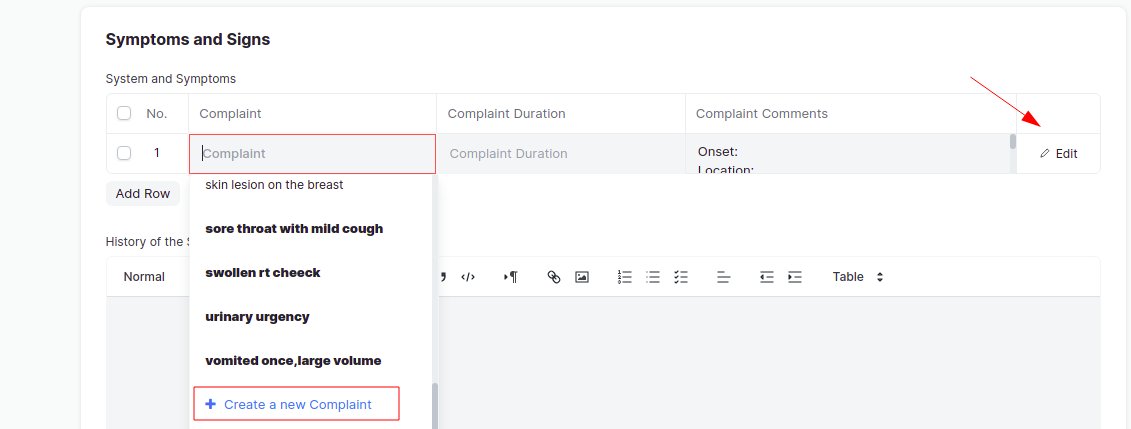
- Scroll down to the table of Symptoms and Signs, and press on Add row to fill in the complaints and Complaint duration. You can also create a new complaint by pressing on Create a new Complaint. More over, click on Edit to add more details.
- Fill in the examination details in History of the Symptoms and Examination Details section (this is mandatory). You can also clear the past history of examination details by pressing on Clear History button.
Adding Preliminary and Final Diagnosis
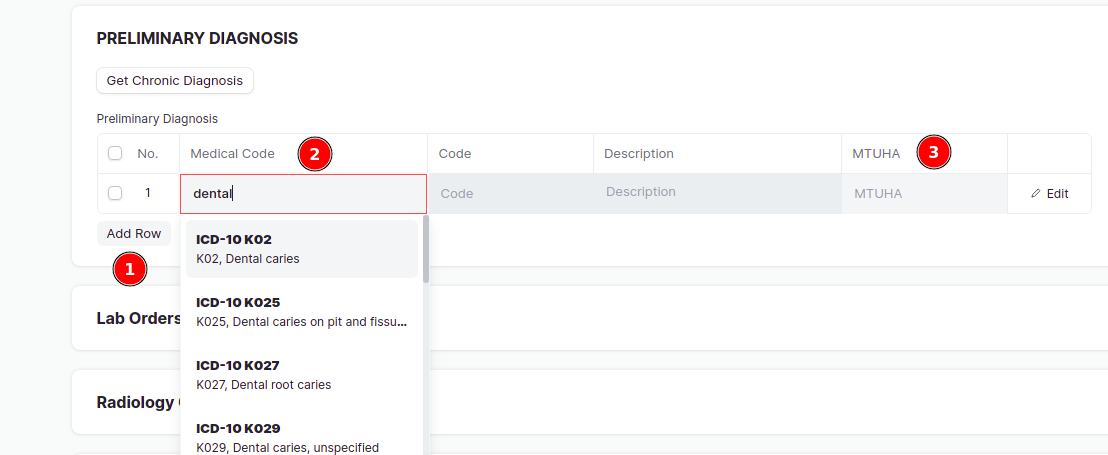
- Scroll down to Preliminary Diagnosis section, press on Add row, enter the Medical code by choosing it from the list, also enter the MTUHA code. You can add more rows by pressing on Add row. Additionally you can also press on the Get Chronic Diagnosis button to get Chronic diseases in Preliminary Diagnosis table if set in Patient list. For setting up the Chronic diseases, click here
- To fill in the Final Diagnosis section, press on the Copy From Preliminary Diagnosis button, this will copy all the Preliminary diagnosis in the Final diagnosis section, additionally, you can press on Add row to add more final diagnosis.

Note: It is important to add both Preliminary and Final Diagnosis.
Entering the LRPMT's
This includes ordering of Lab tests, Radiology Procedures, Clinical Procedures, Medications and Therapies. Follow the steps below to add each of the LRPMT's.
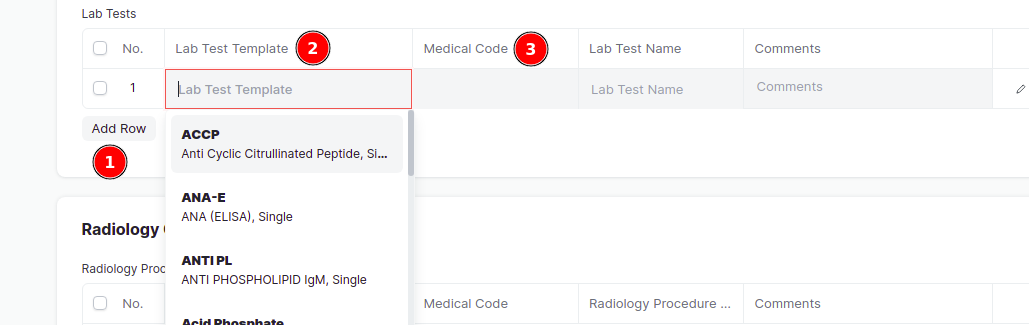
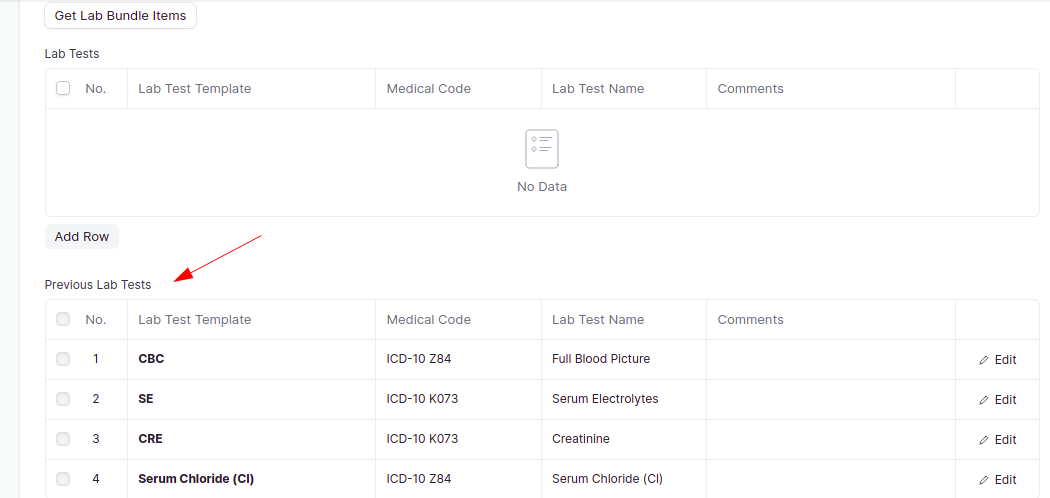
- To add Lab tests, go to Lab Tests table, click on Add Row and enter the Lab test template and choose the medical code. You can also add a comment on the right side. You can click on Edit to see/add more details.
 You can also choose a Lab Bundle (which is a group of lab tests) in the Lab Bundle box, and click on Get Lab Bundle Items and the group of lab tests will appear in Lab tests table.
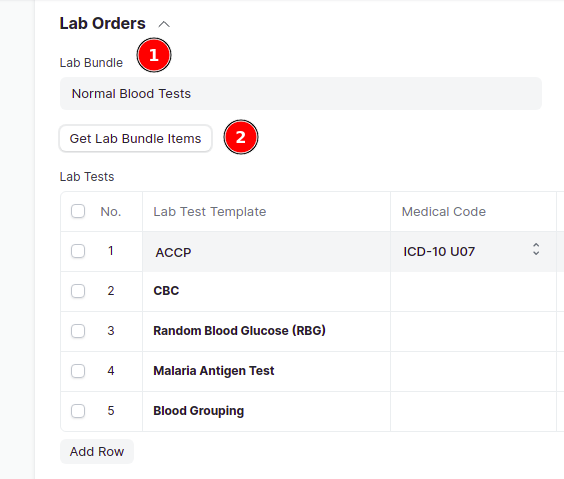
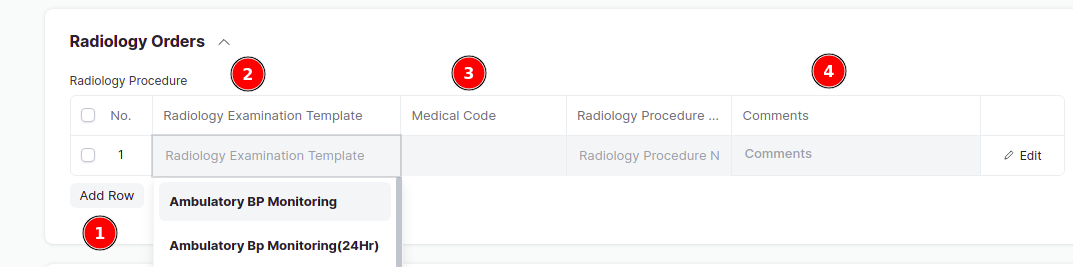
- For Radiology procedures, go to Radiology Orders, press on Add row , enter the radiology procedure in the Radiology Examination Template, choose the medical code. Don't forget to add a comment also (its mandatory). You can click on Edit to see/ add more details.
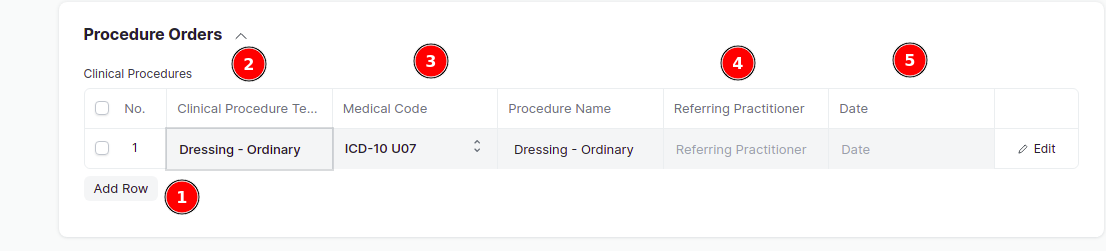
- To add Clinical Procedures, go to Procedure Orders, click on Add row, choose the Clinical Procedure Template to be carried out by the Patient, choose the medical code, you can also choose the Referring Practitioner and Date on when the procedure has to be carried out. You can click on Edit to see/ add more details.
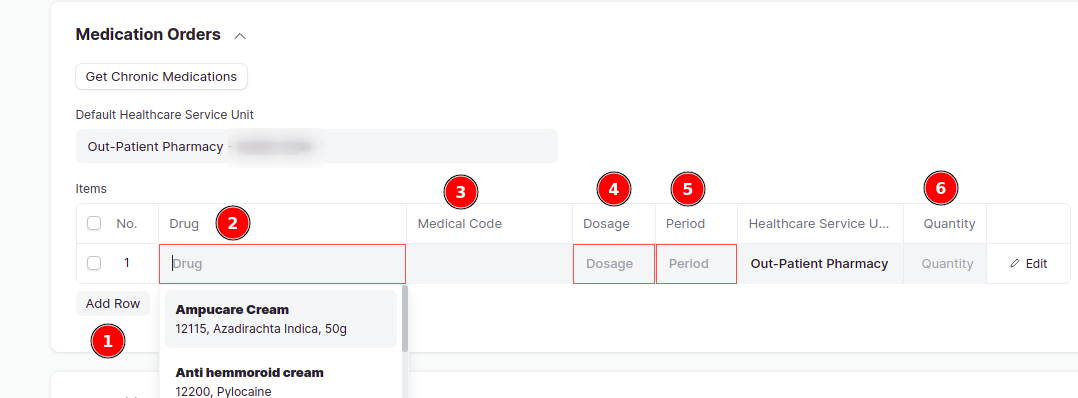
- For prescribing Medications, go to Medication orders, click on Add row, enter/choose the Medication in the box labeled Drug, choose the Medical Code, Dosage, Period, and Quantity (it is mandatory). By default, the Healthcare Service Unit which is set in the Default Healthcare Service Unit will appear in every line, but can be changed if needed. Additionally, you can press on the Get Chronic Medications button to get Medications used by the patient for all time if set in the Chronic Section in Patient list. For more information on how to set Chronic Medications in Patient list, click here
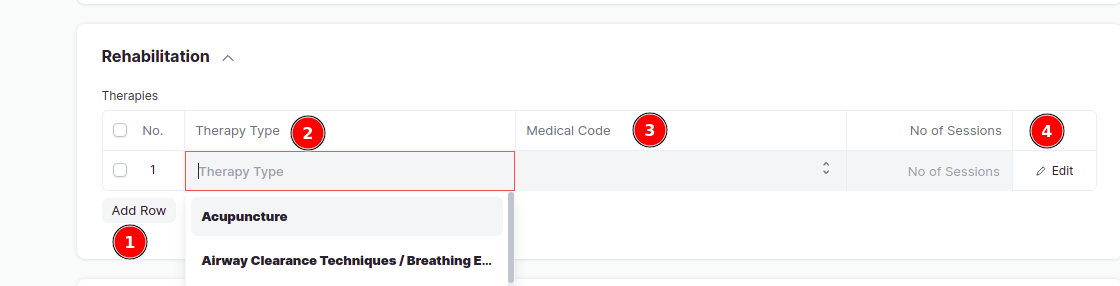
- To add Therapies, scroll down to Rehabilitation, click on Add row, enter the Therapy Type, choose the medical code and enter the Number of sessions to be done.
Adding more details
This includes adding of Diet Recommendation and ED details
- To add a Diet Plan, go to Diet Recommendation section, click on Add row, type the Diet Plan, choose the medical code, you can also enter the Occurance and Comments.
- To write an ED for the patient, scroll down to fill in the ED Reason for Absence, ED addressed to and ED no of Days.
- The Healthcare Practitioner has to Sign in the section of Signatures before submitting.
- More over, the Healthcare Practitioner can add a comment at the end and click on Comment button.
- Lastly, click on Save then Submit.
After Save and Submit
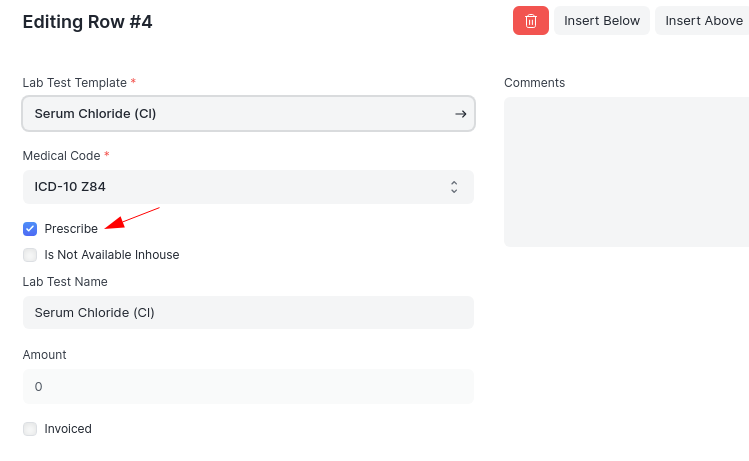
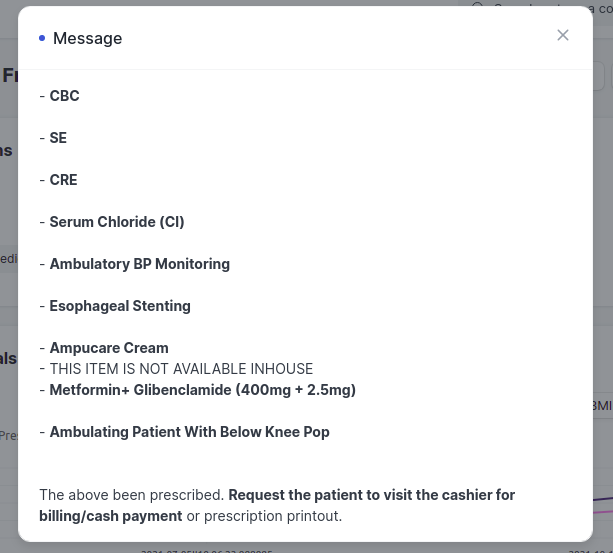
- For Cash Patient, After saving, a message will show in the bottom, informing that the items have been Prescribed and to request the patient to go an pay for the Item. It will also alert you if the Stock of a certain medication is 0, in that case the Healthcare Practitioner should contact the Pharmacy team. Lastly, the message will also show the items which are not available in house and are prescribed. This means that the service is not provided by the hospital. To check the items which are Prescribed / is not available click on Edit in every line item as seen below
- When Submitting, if there is any error, then the Patient encounter will not get submitted. In that case, an error message shall alert on the problem, where by you go back and correct the mistake in the encounter and submit. If the error is an server error or technical error, then contact IT team. After submitting, Request the Patient to visit reception first in order to bill the items and then proceed to get the Healthcare service.
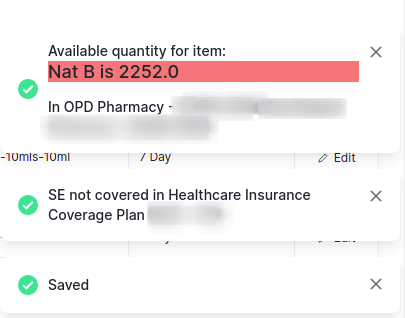
- For insurance Patient, upon Save, the encounter will get saved. If there is no stock for a certain medication, or if an item is not covered in the Health Insurance Coverage Plan, then an error message will appear at the bottom. In that case, the Healthcare Practitioner has to contact the Pharmacy team. Also if an item is not covered in Healthcare Coverage Plan, then open the item by clicking on Edit, and check on Prescribe box if the patient is ready to pay for the Healthcare Service, otherwise the Patient encounter will not get Submitted.Also the message will show the item which is not available in house. In that case, patient has to visit another hospital to get the Healthcare service. The message will also show if items requires Additional authorization, for that request the relevant department to provide the authorization numbers.

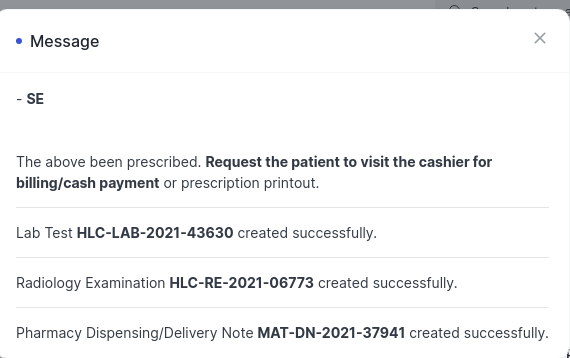
- Upon submitting, if there is any error, the Encounter will not get submitted. If there is no any errors, then all the items LRPMT's will directly be created, hence request the Patient to visit the relevant places to get the Healthcare Service. If there is an Item which is Prescribed, request the Patient to visit reception to pay for it.
Viewing Patient History
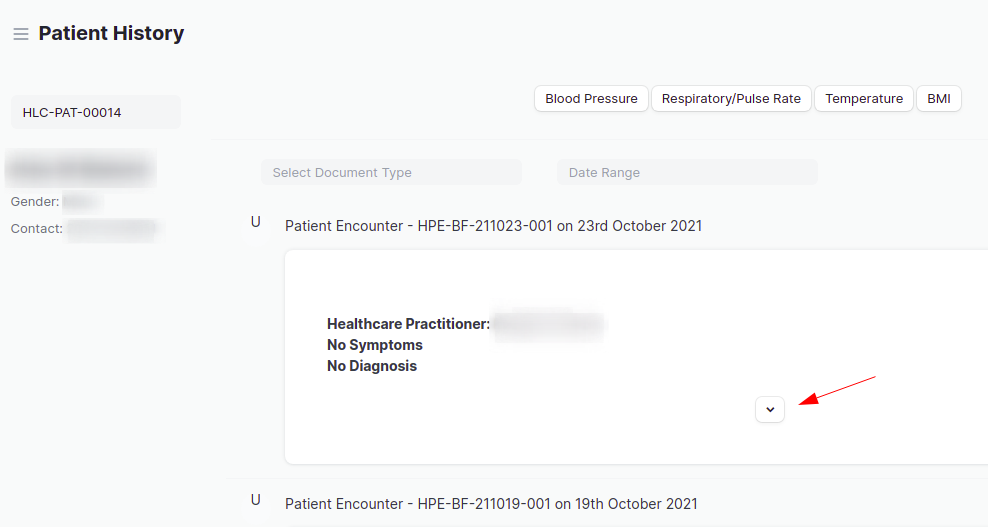
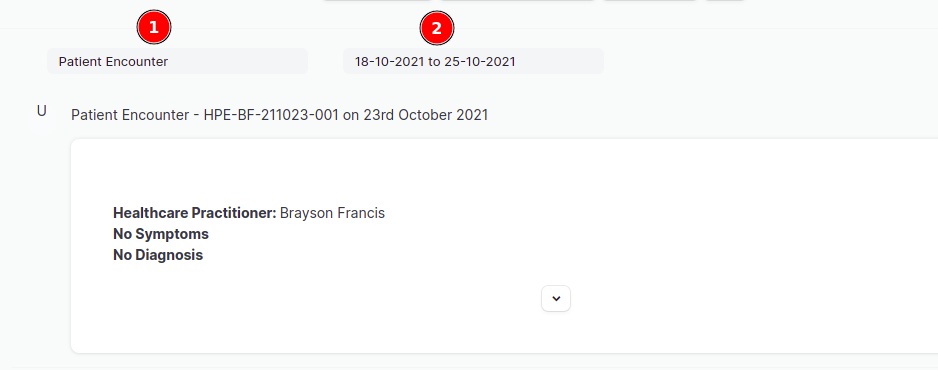
When the Patient returns back to Healthcare Practitioner after the results are out, the Healthcare Practitioner has to open the encounter to view the results by pressing on View > Patient History. The Patient details will appear on the left part, and the History will appear per document type and date on the right of it. Keep scrolling and open the results you want to see by pressing on the down arrow as shown below.
You can also filter out the records by using the Document type and Date range filters. Select all the document types which you would like to filter, by ticking them, and select the date range for which you want to see the records from.
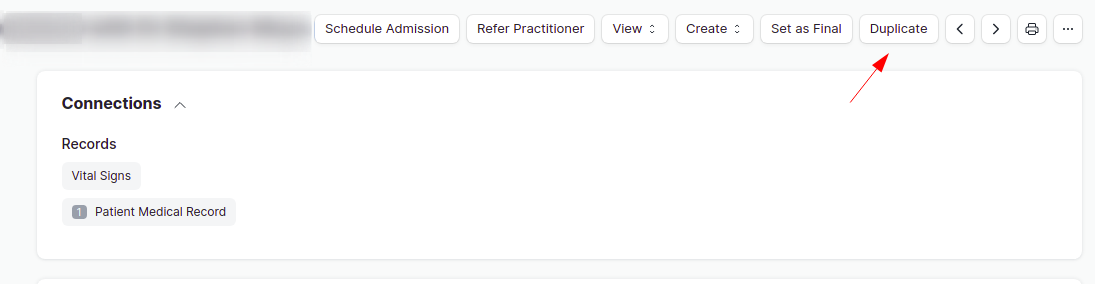
Duplicating Patient Encounter
After submitting Patient encounter, it can not be edited, but can be duplicated by the Healthcare practitioner in order to add more details or LRPMT's. This is used when the test results are out and the Patient revisits the doctor again so that the doctor can prescribe medications or order some more Healthcare services by pressing on Add row in every table of LRPMT's.
To duplicate an encounter, go to the last Submitted patient encounter, then click on Duplicate button on the top, and the new encounter will be created as shown below;
After duplicating, all the information from the duplicated encounters will appear as previous items as seen below;
At the bottom of the Patient encounter, it will show the details about duplicating the encounters where by;
- Duplicated - Means the Patient encounter has been duplicated.
- Reference Encounter - This shows the first encounter number where the duplicating process started.
- Duplicated From - This shows the Patient Encounter number from which the current encounter was duplicated.
Add the LRPMT's and follow the same process and Save and Submit as usual.
Admitting a Patient
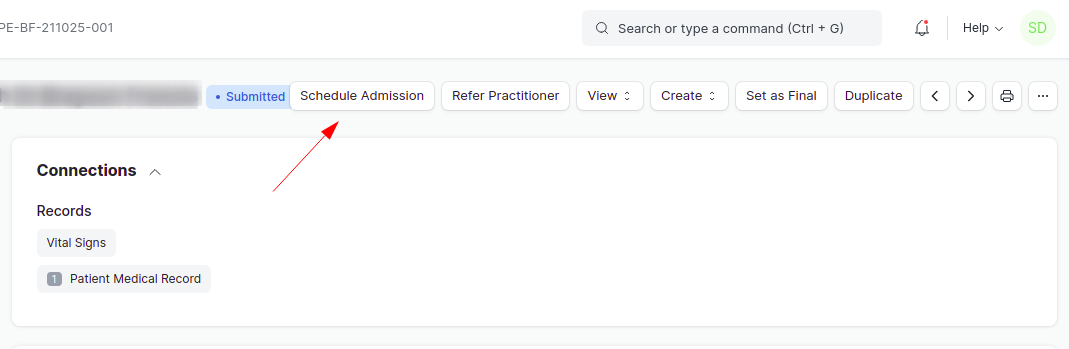
To admit a Patient, go to the last modified or the latest submitted encounter, and click on Schedule Admission button. 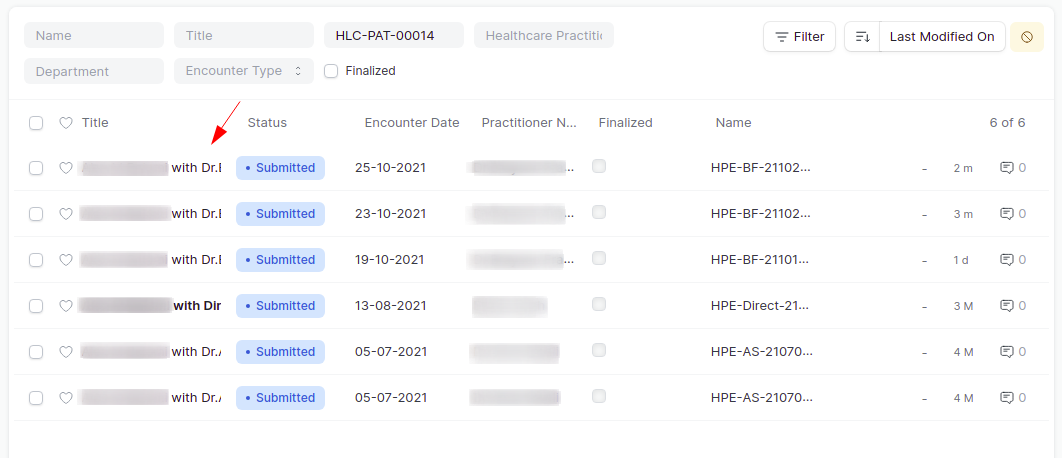
 Then a dialog box will appear, fill in the Admission details such as Secondary Healthcare Practitioner, Service Unit type and Admission details. Lastly click on Order Admission button

When Order Admission will be pressed, an Inpatient Record will created. And the Inpatient Record number will be seen in Patient Information with the Inpatient Status, Admission Scheduled as seen below. To see more details, go to Inpatient Record List.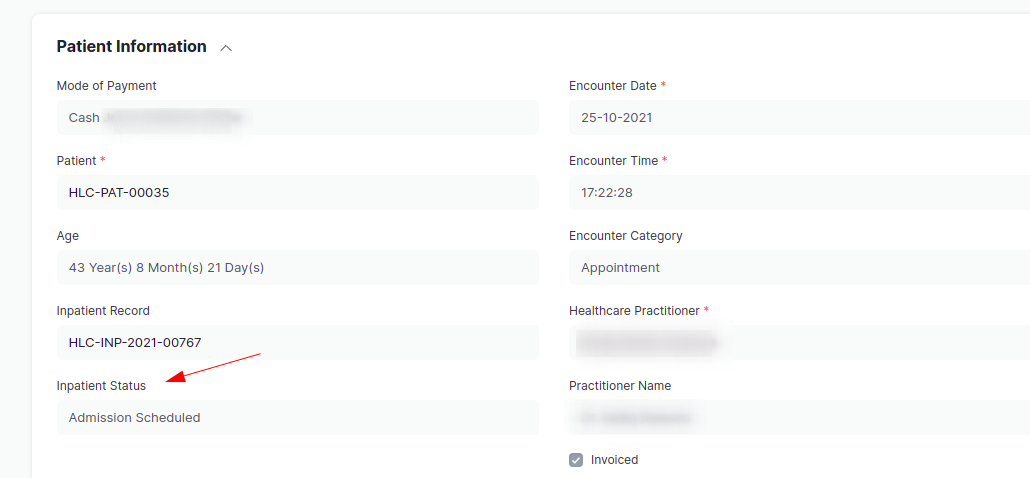
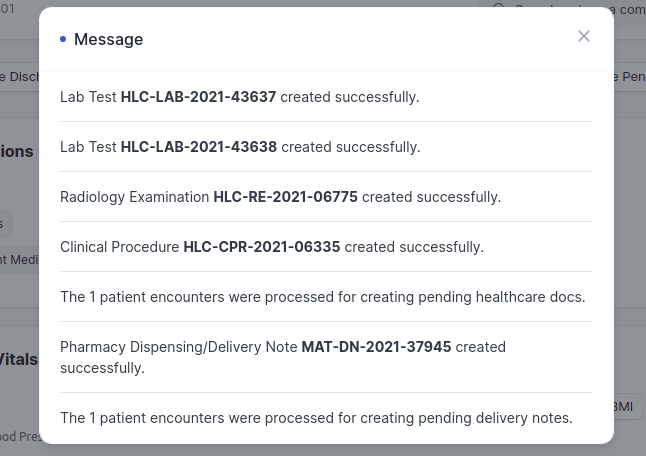
Note: After pressing on Order Admission for cash Patient, press on Create Pending Healthcare Services button to create all Pending Healthcare Services whose sales invoice was not done. This is to allow the Admitted Patient to get the Healthcare Services directly and do payment at last during the Discharge. For Insurance Patient, there is no any Pending Healthcare service as the items are directly created.
Then the Healthcare Practitioner has to press on Duplicate button on the same encounter where Schedule Admission was pressed to create a new Patient encounter in order to proceed with adding of examination details and start giving treatment to the Admitted Patient. If the Healthcare Practitioner changes, then a new Healthcare Practitioner can change the name of the Healthcare Practitioner in Patient Information, and click on Save before proceeding to add details.
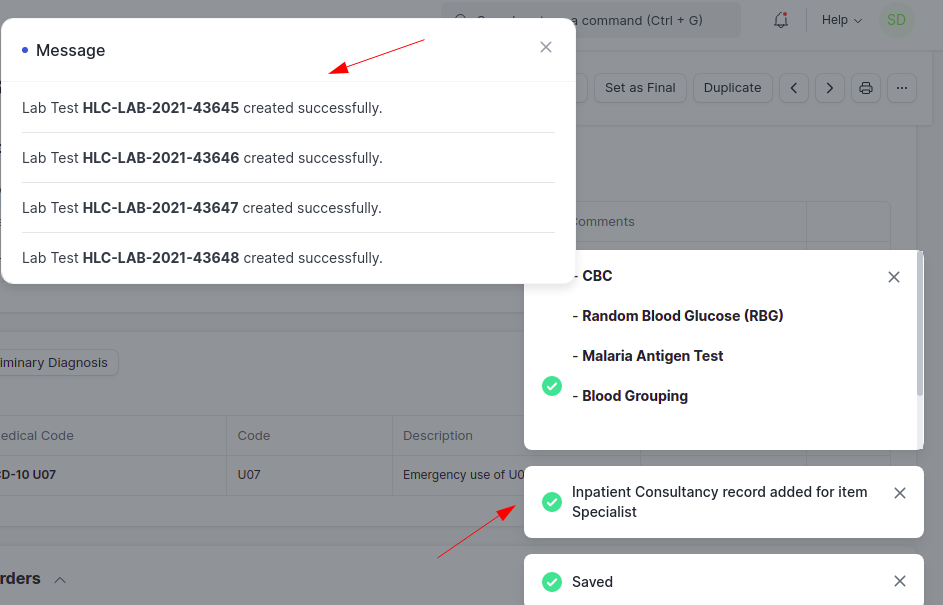
After adding new examination details/LRPMT's, click on Save and Submit. This will directly create the LRPMT's for both cash and Insurance Admitted Patient also the Inpatient Consultancy will be added automatically in Inpatient Record as seen below;
Note: For Insurance Patient, if an item is not covered in the Coverage Plan, the Healthcare Practitioner can check the Prescribe checkbox if the Patient is ready to pay for it, but it will not get directly created, the Patient has to visit the Receptionist to pay for it.
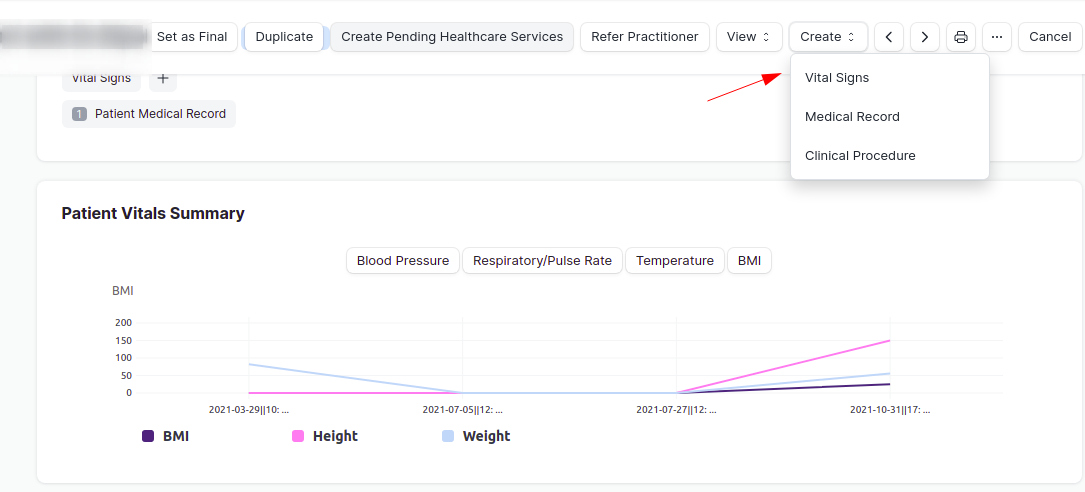
Creating Vital Signs For Inpatient
When the Patient is admitted, the nurse has to take Vitals signs multiple times during the examination process, hence to create vitals signs go to the Patient encounter, press on Create > Vital Signs, this will create the Vital Signs, and can b filled by the nurse, then Save and Submit it. To view the Vitals Signs, go to View > Patient History
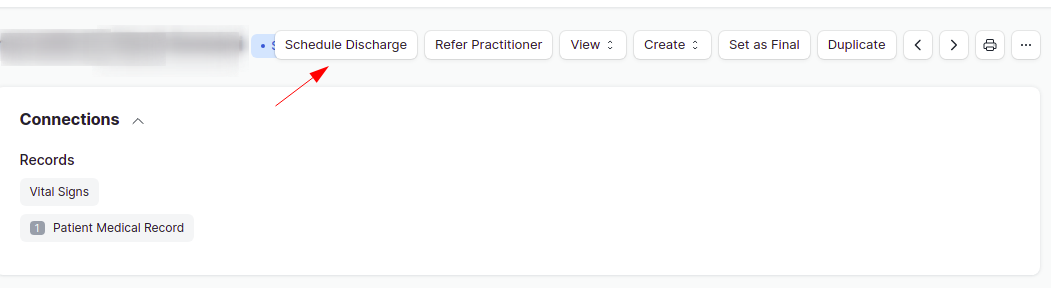
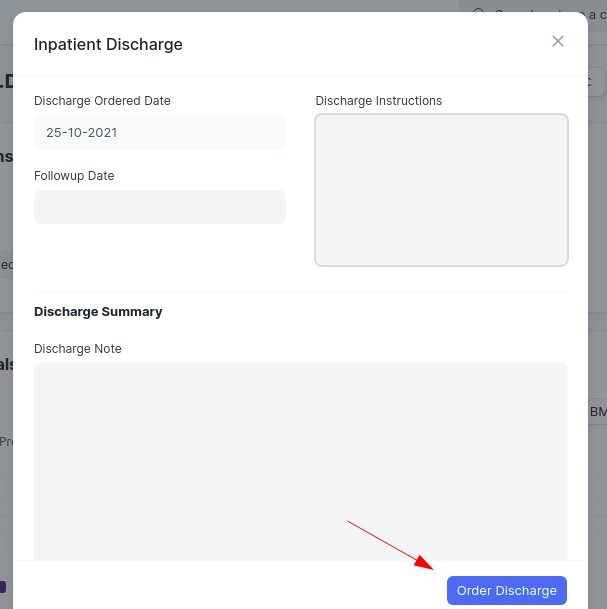
Discharging a Patient
To discharge a Patient, the Healthcare Practitioner has to go to the latest submitted Patient encounter, and click on Schedule Discharge button, a dialog box will appear, where by the Healthcare Practitioner has has to fill in details about Discharging the Patient, and lastly click on Order Discharge. This will change the Inpatient Status to Discharge Scheduled and the bed in Inpatient Record will be vacant automatically upon discharge schedule by the Healthcare Practitioner.
Note: To maintain the chain of Patient Encounters, it is must to use the latest or last modified encounter to do Schedule Admission, Duplicate and Schedule Discharge Schedules respectively as shown above. After Schedule Admission, the Receptionist has to proceed to Admit the Patient in Inpatient Record, and then the Healthcare Practitioner continues to add details by duplicating the encounters, lastly the Healthcare Practitioner does Schedule Discharge and the bed becomes vacant, after that, the Receptionist proceeds to Discharge the Patient in Inpatient Record and the Patient gets discharged. All of this can be summarized as follows; Schedule Admission > Admit (by receptionist) > Schedule Discharge > Discharge (by receptionist).
Setting as Final
Lastly, after the final set of consultation and examination is over, the Healthcare Practitioner has to press on Set As Final button on the top of the encounter to indicate that the consultation/examination/treatment is over. This should be done for every patient regardless whether the Patient is Cash or insurance patient or is an Inpatient.
Note: It is recommended to press on Set as Final button for Insurance patient before the Patient takes his or her insurance card, so as to allow them to proceed to Sign the claims.
Additional things to note
- It is important to fill in MTUHA code, otherwise the Patient encounter will not get submitted.
- The places marked in Red color are mandatory to be filled in e.g Comments in Radiology examination.
- For cash patients, therapies will automatically get created when patient encounter is submitted.
- It is important to finalize the encounter at the end of consultation period.
- Before Setting as Final, the Healthcare Practitioner has to schedule discharge for the patient.
- For cash patients, the billing is done through Sales Invoice for billing.
- After Schedule Admission, the Healthcare practitioner has to press on Create Pending Healthcare services in order to create the pending items which were not billed using Sales invoice for Cash inpatients.
- To add any item in a table start by pressing on Add row.